
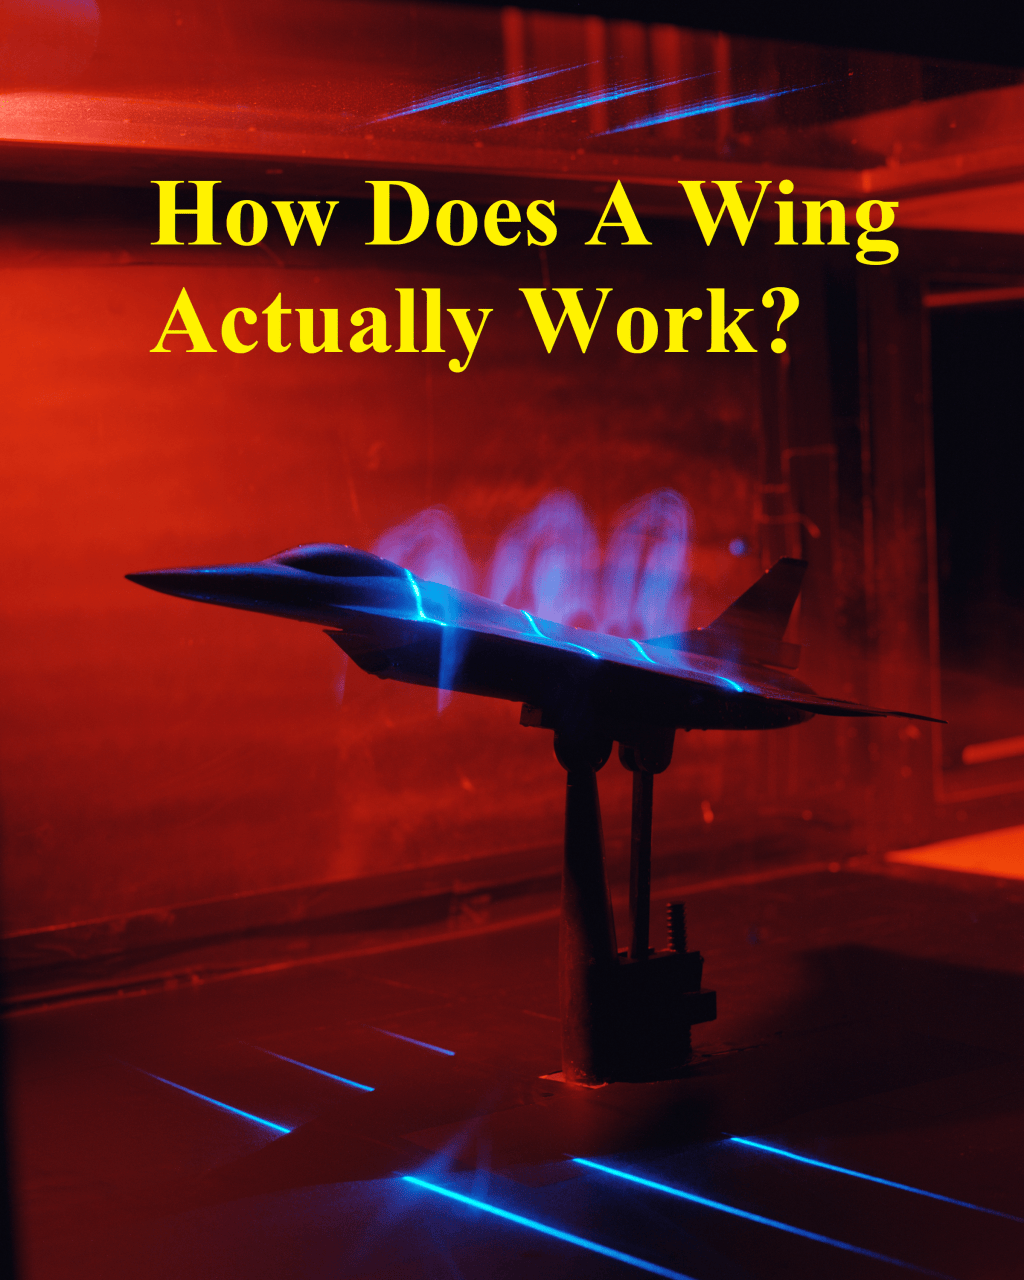
Great Wright Stuff planes are not built by luck; they are built on physics. By learning how Newton’s laws and Bernoulli’s equation explain how lift is generated, you can empower yourself to tell a good wing apart from a bad one. Read on!
The Foundation: Newton’s Laws and Bernoulli’s Equation
Isaac Newton’s three laws of motion explain how objects move when forces push or pull on them. The first law states that an object will keep doing what it is already doing, whether sitting still or moving at a steady speed, unless an outside force acts on it. The second law connects force, mass, and acceleration, showing that heavier objects need a stronger push to speed up or slow down. The third law explains that forces always come in pairs: whenever you push on something, it pushes back on you with the exact same strength in the opposite direction.
While Newton’s laws focus on solid objects, Bernoulli’s equation looks at how fluids like air and water behave when they flow. Named after the scientist Daniel Bernoulli, this rule is basically about keeping energy balanced inside a moving fluid. It states that as the speed of a fluid increases, its internal pressure drops. You can see this in action when you place your thumb over the end of a garden hose. Narrowing the opening forces the water to speed up, which lowers the pressure right at the tip.
How Both Work Together to Make Lift
When you put both ideas together, you can see how an airplane wing generates lift. As a wing moves forward, its curved shape and slight upward tilt guide air smoothly around it. Because the air rushing over the top of the wing speeds up, Bernoulli’s equation tells us the air pressure above the wing drops, creating an upward pull from the higher pressure underneath.
At the same time, the wing bends the path of the air downward as it passes by. By Newton’s third law, pushing all that air downward creates an equal and opposite push upward on the wing itself. Both pressure differences and downward air deflection work together as two sides of the exact same coin to keep the plane in the sky.
Where Online Diagrams Get It Wrong
As you explore this topic online, be careful with the drawings and animations you find, because many of them get the details wrong. Most sketches falsely show the incoming air splitting right at the very front tip of the wing, and they often claim the top and bottom air streams must meet back up at the rear edge at the exact same time, completely missing the downward deflection of air that extends behind the wing (i.e. downwash).
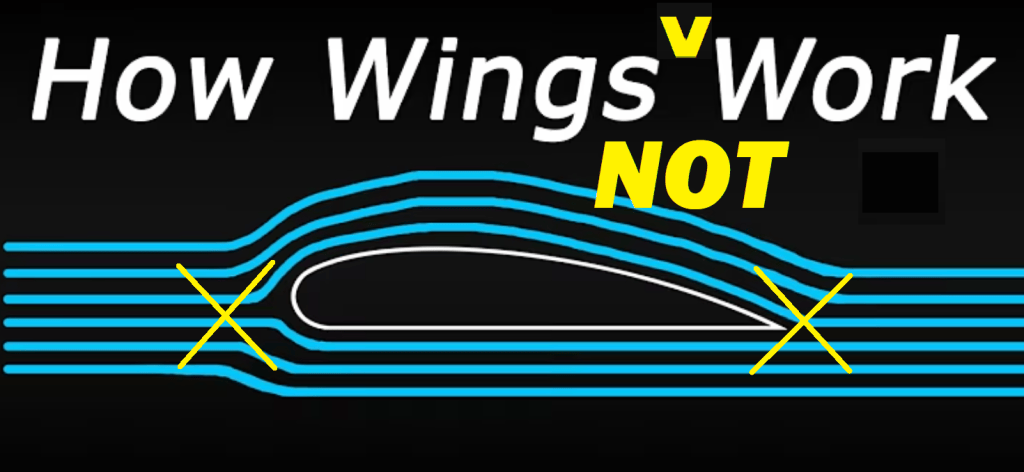
In reality, the air tilts slightly upward before reaching the wing, so the actual splitting point sits a little further back underneath the leading edge. Furthermore, Bernoulli’s equation tracks energy along a single path of moving air, meaning it never requires separated streams to arrive at the back edge together, and the faster top stream usually wins the race. It also never guarantees that two adjacent streams will behave symmetrically after splitting—as your wing slices through them, it accelerates each side unevenly and drains energy from the boundary layer through friction. Instead of trusting a simple artist’s sketch, always look for real wind tunnel photos and smoke trail videos to see how air truly behaves around a wing.
The wind tunnel smoke demonstrations below show the actual upward tilt before the leading edge, the true splitting point, the downwash after trailing edge, and why the upper airstream reaches the trailing edge first:
Centripetal Force: Turning in the Gym and Bending Air Over the Wing
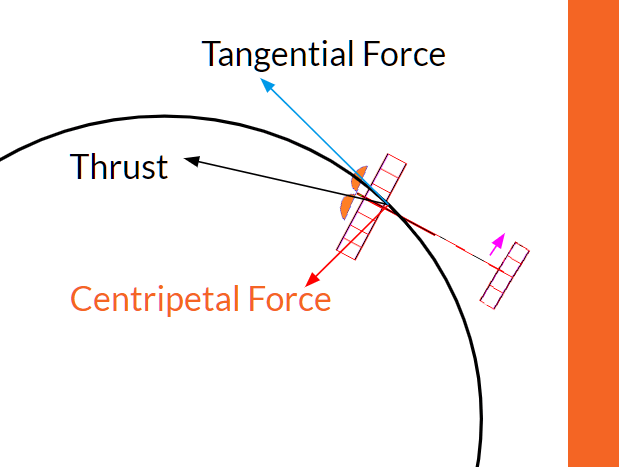
Isaac Newton’s second law also explains how a Wright Stuff indoor airplane stays inside a gym by flying in a continuous left turn. According to the first law, the airplane wants to keep flying in a straight line toward the wall, so it needs an inward pull, called centripetal force, to constantly bend its path into a circle. Newton’s second law shows that the size of this inward force depends on how fast the plane is moving and how sharp (smaller radius) the turn is, (). When you adjust the plane to fly in a smaller circle, the direction changes much more quickly, which means the propeller and the rudder must generate a noticeably bigger centripetal force to pull the aircraft around that tight turn.
We can apply that exact same centripetal force idea to a tiny pocket of air flowing over the curved upper surface of the wing. As each little pocket of air follows the downward curve of the wing, it needs an inward, downward pull to keep it from flying off in a straight line. The curved top surface pulls these air pockets downward one by one, which in turn pulls the next layer of air above them downward, bending entire streams of air along the shape of the wing.
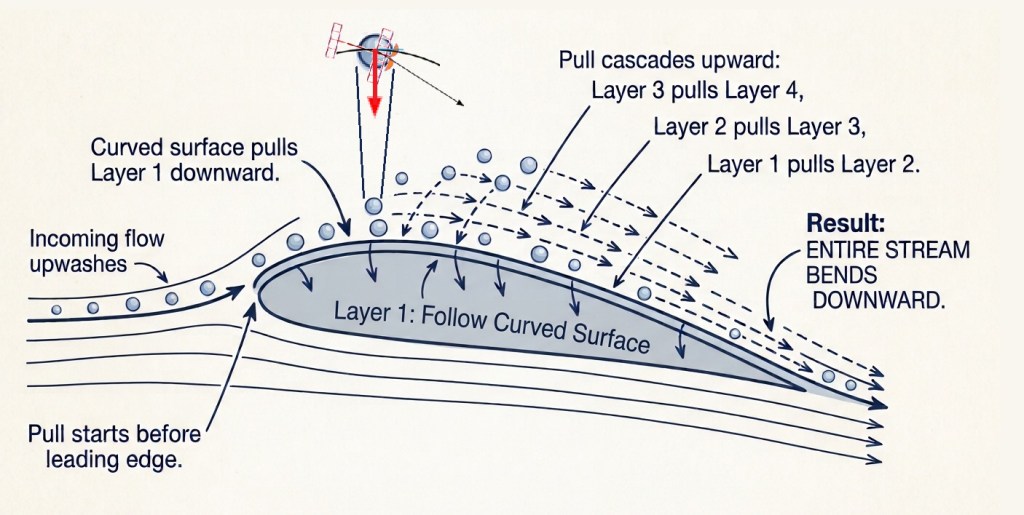
By Newton’s third law, because the upper surface is continuously pulling all those air pockets downward, the air pulls back on the wing with an equal and opposite force, creating both lift and drag. A similar process happens along the lower surface of the wing, where the air is pushed and curved in the opposite way, adding its own share of upward lift and backward drag to complete the picture.
Looking Ahead: From 2D Slices to 3D Flight
Everything we just explored looks at a flat, two-dimensional slice of air flowing over a basic cross-section of a wing. Real flight, however, happens in three dimensions, where air swirls off wingtips, curves across changing wing shapes, and behaves in even more exciting ways. We’ve touched on parts of that three-dimensional world in a few previous posts—such as Rounded Corners vs. Wintip Plates—and we’re just scratching the surface—stay tuned as we unlock the secrets of optimal wing planform and lift distribution!!
As you keep learning, make a habit of observing real air in motion through wind tunnel footage and your own test flights rather than relying on simplified drawings. Take what you observe, test your ideas, and use that real-world knowledge to design, build, and trim your very own winning Wright Stuff airplane.
Cheers!
–AeroMartin 11/15/2026


Leave a Reply